How to connect Mobius camera – Boscam FPV – MinimOSD (noise problems, solution)
This is how I connected a Mobius ActionCAM , a MinimOSD and a Boscam FPV 5.8G 400mW AV Transmitter Module TS353 to get picture on a FEELWORLD FPV-769A 7″ HD 800x480p FPV Monitor through a Boscam FPV 5.8G 400mW AV Receiver RC805.
1. Connecting Mobius camera and Boscam TX
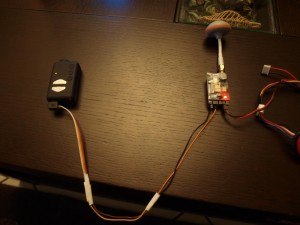
First of all I connected the mobius camera to the Boscam TX to check everything was fine.
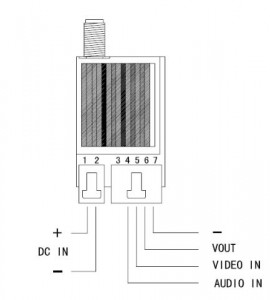
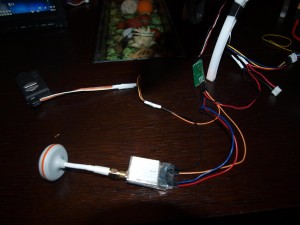
The orange wire from mobius camera (video out) goes to pin 5 (pic 2) of boscam TX (video in) and
The brown (and then black) wire from mobius camera (ground) goes to pin 7 of boscam TX.
I didn ‘t use the audio out wire from the mobius camera as the boscam tx already has a mic.
To the pins 1 and 2 of the boscam tx I connected the + and – of the 3s battery.
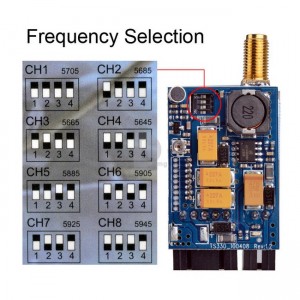
I selected channel 8 by setting the micro switches of the boscam tx (pic 3).
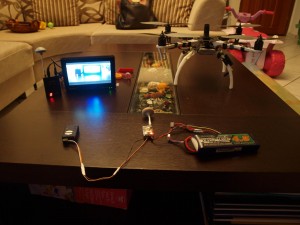
I connected the battery to the boscam rx and feelworld fpv monitor and chose channel 8 in rx and here is the result(pic 4).
2. Adding MinimOSD into the equation (5v from APM – 12V from battery)
So connecting a mobius camera with a boscam fpv set was pretty straightforward but what happens when you want to display telemetry info on the screen? Then you need MinimOSD. MinimOSD is a intervention circuit which takes the video input signal, enriches it with APM telemetry data and then sends the output to the fpv tx. MinimOSD by default needs 2 powers supplies: a 5v from the APM controller and a 12V from an external battery. This can be overrided by soldering some pads but this is not recommended.
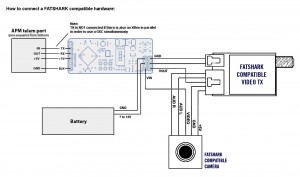
Consulting the following diagram (pic 5) I added the MinimOSD circuit through the mobius camera and boscam tx connection (pic 6). The only difference with the diagram below was that Mobius camera has only two wires to connect (brown for the ground and orange for the video out). So, I connected the + and – from the battery to the 12V and ground pins into minimOSD and from there to the boscam tx. The mobius Vout wire goes into VIN pin of minimOSD and from there through the VOUT pin into boscam VIN. I connected the Y style telemetry cable provided with minimOSD to the telemetry side of minimOSD (3 cables: 5v, ground and rx) and enabled telemetry throught the missionplanner because before that no data was taken.
Unfortunately something went wrong. As you can watch on the video there is a strong noise interference. As you can see on the video the moment I touch the MinimOSD circuit the noise goes away and everything works as it should. That was unexpected because this is the second minimOSD circuit I own and the first worked fine untill it “died”.
Notes:
I have connected the minimOSD circuit through a FTDI cable and it worked fine. So the noise comes from the APM.
Things To do :
Supply the required 5volts to the minimosd circuit through a BEC and not directly from the APM.DONE. SUCCESS.
3. Solution: Power Supply (5v) the MinimOSD circuit through an ESC
So after removing the 5V and ground pins from the telemetry Y cable and replacing them with the 5V and ground from an ESC the noise went off. I measured the voltage with a multimeter and when connected to the APM the voltage was 4.92 compared to 5.09 when connected to the ESC.
Parts used:
TX: Boscam FPV 5.8G 400mW AV Transmitter Module TS353
RX: Boscam FPV 5.8G 400mW AV Receiver RC805
Camera: Mobius ActionCam
OSD: MinimOSD
Monitor: FEELWORLD FPV-769A 7″ HD 800x480p FPV Monitor w/ Sun Shield
Battery: 2-3s
